
If you’re running into issues with playing certain graphically-demanding games, the problem may be with your VRAM.
While not all computers have the capability to change their dedicated VRAM, for those that do, upping this value can solve or alleviate many graphical issues.
There are even some things you can try for computers that do not have a configurable VRAM.
In this guide, we’ll show you how to increase your dedicated VRAM in two ways: by changing the VRAM in the BIOS and by changing it in the registry.
The latter option does not actually change your VRAM, but it can trick non-configurable computers into thinking they have more VRAM than they actually do.
This can be a life-saving technique for laptops or integrated-graphics models that might not be able to run certain games otherwise.
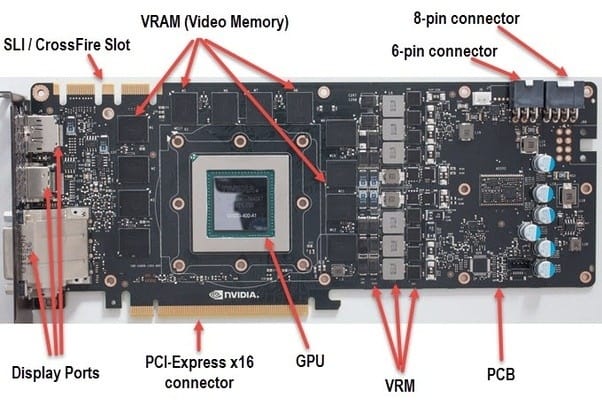
Table of ContentsShow
Option 1: Changing VRAM In The Bios
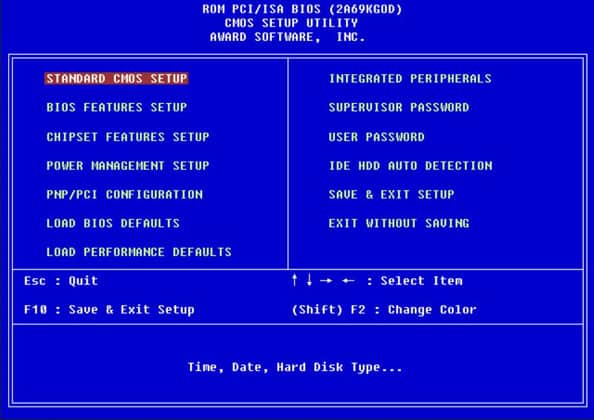
To change the VRAM of your computer in the BIOS, you will first need to navigate to your device’s BIOS menu. Your computer should have a dedicated key to press during the boot sequence that will take you to the BIOS. Some common options are the function keys or the delete key.
Once you’ve navigated to the BIOS, you’ll need to find the place where your computer stores its video settings. This can be under many names, but it’s typically located under your computer’s advanced settings. Keep a lookout for anything similar to Video Settings or Graphics Settings.
A computer with configurable VRAM should have several increments available for you to choose from. All you need to do is pick a higher setting and save your changes. Upon restarting your computer, these changes should take effect!
Option 2: Changing VRAM In The Registry
This second method doesn’t actually increase your VRAM; instead, it tricks your computer into thinking it has more of it. However, there’s a catch: this method only works for Intel-brand integrated cards.
To begin, search for “regedit” after opening the Start menu. Select the Registry Editor program when it appears. Find the folder in the left-hand menu called HKEY_LOCAL_MACHINE, then SOFTWARE, and finally Intel. Next, right-click on the Intel folder and choose New, then Key. Name the new key GMM.
Next, right-click on the opposite pane and choose New again, then DWORD (32-bit) Value. Name this new item DedicatedSegmentSize. Once this is created, double-click on it, and an information box should pop up.
Select the box next to Decimal and type your desired amount of VRAM under Value data. This number should be between 0 and 512.
Once you’ve finished all of the above, your computer will think your Intel integrated graphics card has a VRAM matching the number you entered. This is especially useful for games that require a certain amount of VRAM since it tricks the game into thinking your computer fulfills those requirements.